Saturday 26 November 2016

The honey flow is on

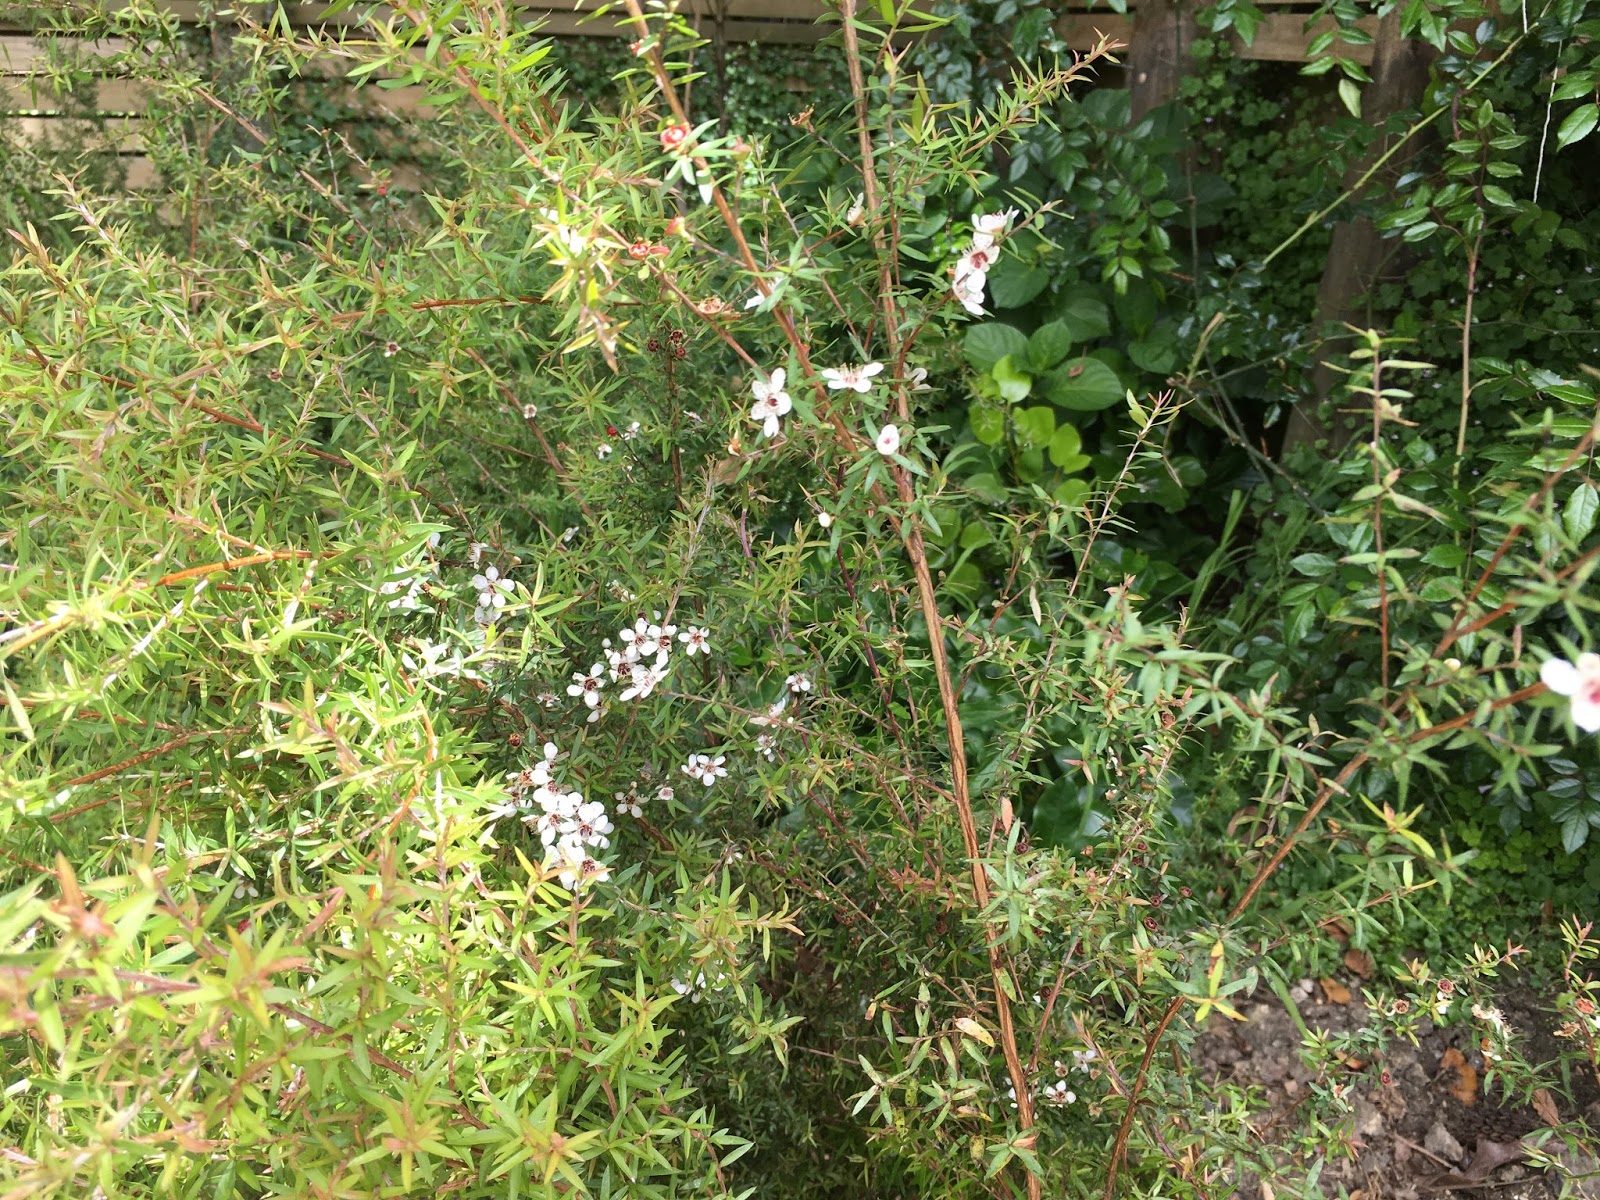
Manuka just starting to flower in spring

The manuka is starting to flower! That's here in Auckland. In Northland it is partly over, not been a great season for them apparently as it was quite wet this spring. And further south, the trees will still be budding up.

But right here, we've got about 6 weeks of lovely manuka flowers for our bees to go out foraging on, to make high grade manuka honey. This is called the Honey Flow.

How to tell when the honey flow is starting?

How do you identify when the nectar is ready and the bees are starting to make honey?

There are 4 things to look for:
1. The bees are out and about, on the flowers, and they are non-aggressive
2. The entrance to the hive is very active with bees
3. They are building white wax in the hive, which will become the honey comb
4. If you tip a frame up, fresh nectar will drip out

Why timing your bee build up is so important

It's important to get the timing of the bee colony numbers build up just right.

If the bees build up too quickly, and are at peak before the honey flow, they may starve (and die).

If they build up too slowly, then once the nectar starts, there will not be enough bees to maximise nectar collection and honey production and the beekeeper will miss the honey flow, and have a poor harvest.

It they build up too quickly, they are likely to swarm. And you lose half your bees to some distant tree.

You want a large population of workers old enough to forage for nectar right as the honey flow starts. How many is 'large'? Enough bees to fully occupy more than 1 brood box.

How to take advantage of the honey flow

There are quite a few more steps to ensure you have a good harvest:

1. What size hive is best? Lots of small ones? A few big ones?

2. When do you add honey supers (the boxes that go on the top of the hive that get filled with honey)? How many honey supers should you add at a time? 

3. How often do you need to check the hives?

4. What type of frames should you add? - drawn comb frames or foundation? - this means frames already with the honey comb on them (drawn), or frames where the bees build their own comb (foundation). This will have a definite impact on your harvest.

To read more about these issues, visit the full post here at Business of Bees.

Friday 11 November 2016

How to grow manuka from cuttings v2

Last week's cuttings didn't do so well now did they? Drat!

So I had a bit of a think about what went wrong. And did some research.

And here is what I remembered, and discovered:

Spring cuttings


Spring v Autumn

There is quite a difference in technique in making cuttings in spring and in making cuttings in summer and autumn.

In spring the trees are just starting to grow. The new tips are soft and tender and small.

In summer and autumn the tips are much hardier. The wood is harder, the tips are longer between the leaves (called nodes).

Both times are good, as the tree is still growing, but a different method of making cuttings is required. And last week's experiment was the autumn way. In spring.

So, how did I do it this time round?

Spring Cuttings

The trick with cuttings is to make them about 3-4 nodes long. Now the problem with this is that manuka has tiny leaves. So 3-4 nodes is tiny also. And in spring the growth is REALLY close together.

In the end, I made mine about 3cm (1 inch) long. Still more than 4 nodes, but about the size my fingers could cope with.

tiny spring cuttings of manuka
And guess what? It worked! They all look pretty much the same, a week later, as the top picture when I had just planted them.

Next up, I'll let them grow until they start producing roots, then let you know just when to pot them up, how to tell, and what to do next.

In the meantime, if you want a bit more in depth information, and more pictures check out the full post in Business of Bees.

And don't forget to sign up for your free Step by step guide to growing manuka from seeds.
Spring's a great time of year to grow manuka from seed!

Friday 4 November 2016

Growing Manuka Trees from Cuttings

Spring growth manuka

It's spring. Our big manuka trees are shooting forth, creating new leaves on their tips. It must be time to take cuttings.

The first batch of cuttings we did are doing amazingly well. They are 18 months old, over a metre tall, and flowering. Already!

Flowering manuka

So I thought I would make some more. We've done a lot from seeds, but if cuttings grow faster, then that would be a good thing to do too.

Softwood v Semi-hardwood cuttings


At this time of year the manuka trees are just starting to grow and produce new growth tips. Cuttings taken from brand new tips are called softwood cuttings. Because the wood is 'soft' I guess.

The last lot of cuttings I took, in autumn, were from semi-hardwood cuttings - so the wood is firmer and the new shoots are tougher.

The other type of cuttings that you can take are hardwood cuttings, which are taken in late autumn and winter, and when the plants are dormant. This type is usually used for deciduous trees, so not appropriate here.

Both softwood and semi-hardwood are supposed to be good for manuka.


Taking manuka cuttings


How to take cuttings


1. Cut off a tip from a branch.
2. Strip off the bottom leaves.
3. Dip in root-forming hormone.
4. Put into a pot of potting mix and firm down.
5. Water lightly.


Newly potted manuka cuttings

And here they are. Looking good!

But a week later, this is what they look like:


Eek! Not so good huh?

So, what went wrong?

There are 3 things that might have gone wrong.

1. Cuttings need to be fresh off the tree


With these ones the trees were far away from my potting station. It took a couple of hours before I got to turning them into proper cuttings and planting them.

2. Cuttings in autumn are best


These were very soft wood cuttings. The manuka trees I took these from were only just beginning to grow for the season.

I think that spring is best for planting seeds, and autumn is best for making cuttings. The ones I did in autumn were just so much more robust, not all flimsy and floppy and soft.

3. Do not over-water


Its possible they have had too much water. 

It would be ideal to mist them until they strike. But the Department of Weather has not obliged, and it has been raining. Not intensively, but not a fine mist either.

The best way to do cuttings at home


So the best way to do cuttings in your backyard is to do them in autumn. Leave the tricky aspects of cuttings in spring to the commercials. Instead, spring is a great time to sow seeds.

Always something to do...

To get a free pictorial step-by-step guide to Growing Manuka from Seeds, sign up here. And check out Business of Bees for in-depth downloadable courses on establishing your manuka plantation with bees in mind.

Post script:

I tried again, after a bit or research and remembering, and it worked much better. Just needs a 'spring way'. Check out the post here